Track Spike Selection Calculator
Select Your Track Surface
Choose your track surface type to determine the optimal spike configuration for your event.
Whether you’re stepping onto the oval for the first time or refining your technique for a national meet, knowing the right track and field equipment can make the difference between a personal best and a painful flop. Below is a practical rundown of the gear you’ll encounter across running, jumping, and throwing events, plus tips on picking the right pieces and keeping them in top shape.
Running Events: Shoes, Spikes, and Timing Tools
When it comes to sprints, middle‑distance, or long‑distance races, the foundation is what’s on your feet.
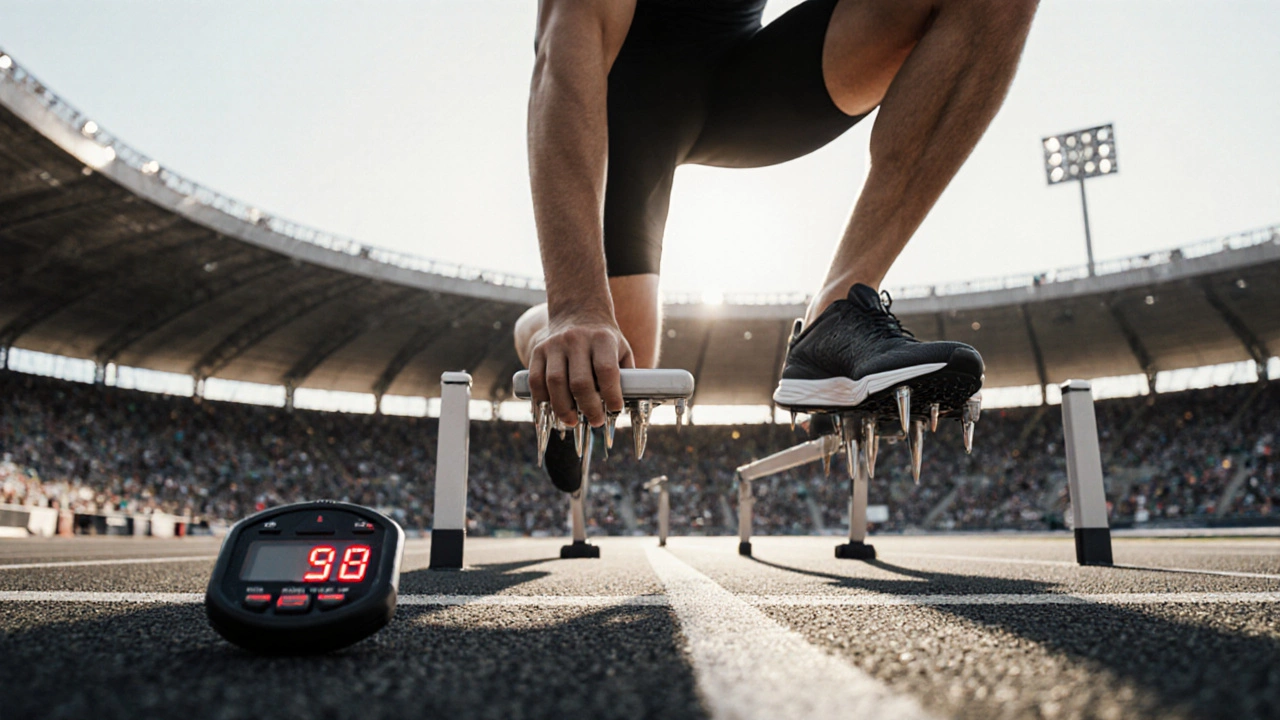
Sprint spikes are lightweight shoes with metal or ceramic pins that dig into the track, giving you a firm launch. They usually weigh under 250g and come in three pin configurations: 4‑pin for indoor surfaces, 6‑pin for synthetic outdoor tracks, and 8‑pin for very soft surfaces. The right pin count matches the track material, preventing slippage and reducing injury risk.
For distance runners, road racing flats provide a bit more cushioning while still being light enough to maintain speed. Look for a heel‑to‑toe drop of 4‑8mm to encourage a natural stride.
A digital stopwatch or timing gate helps you track splits during training. Timing gates use infrared beams and can record reaction time, a crucial metric for sprinters.
Starting Blocks: The Launch Pad
Most sprint events require starting blocks, a pair of adjustable metal plates that lock the athlete’s feet at the start line. Block spacing and angle can be altered to match personal preference and race distance. Beginners often set a 45‑degree angle for the rear foot and a 30‑degree angle for the front foot, then fine‑tune after a few practice starts.
Proper block setup can shave 0.05-0.10 seconds off a 100‑m dash, which at elite levels is the margin between a podium finish and fourth place.
Hurdles and Barriers: Height, Weight, and Grip
Hurdle events rely on adjustable hurdles. They consist of a weighted base, a crossbar, and a locking mechanism to set heights from 30cm (youth) up to 106.7cm (men’s 110‑m hurdle). Look for a smooth pivot action so the bar falls safely if struck.
For steeplechase, the water jump barrier is a taller, sturdier obstacle that includes a water pit. Athletes should practice clearing the barrier with a low, efficient trajectory to minimize time spent in the water.
Jumping Events: From Bars to Mats
High jump and pole vault share a few core pieces of gear but differ in specifics.
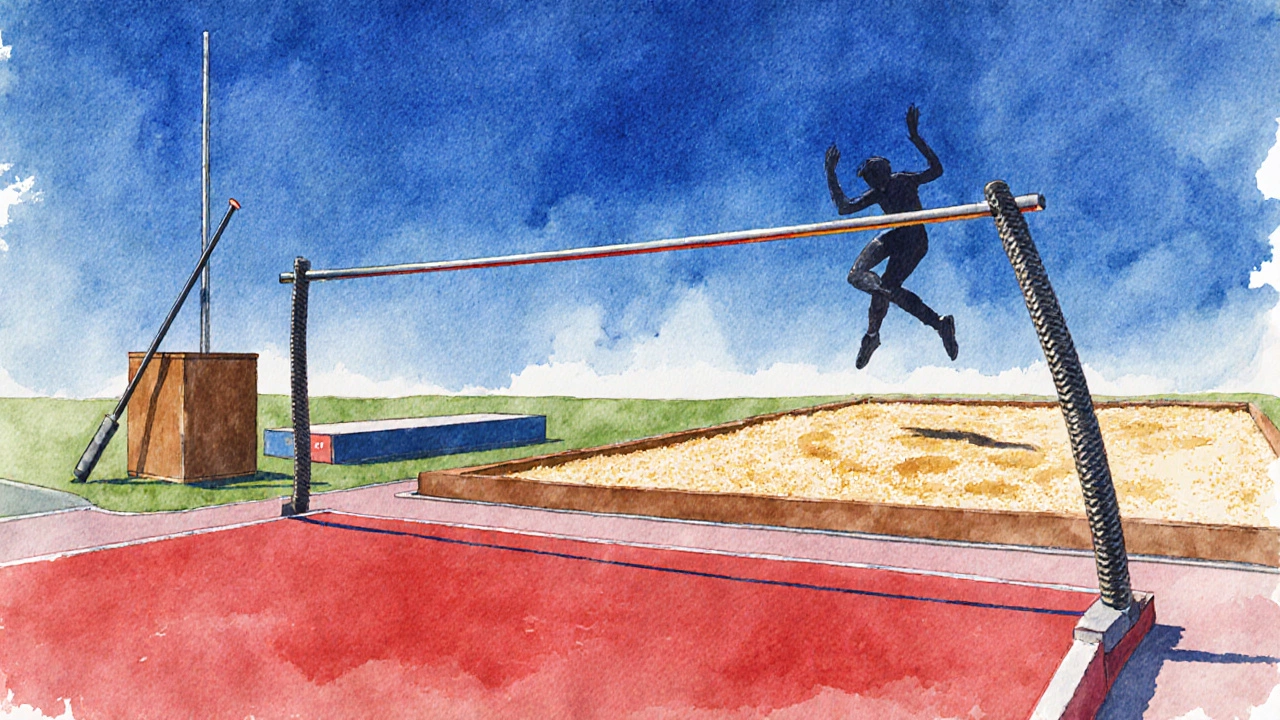
High‑jump crossbars are lightweight fiberglass or carbon‑fiber rods that flex under load. They’re calibrated in 5‑cm increments, usually ranging from 1.50m to 2.60m for competitions.
The high‑jump landing mat must be at least 0.70m thick and cover a 2.0×2.0m area, providing enough cushioning to absorb impact from a 2‑meter clearance.
Long‑jump athletes need a sand pit that’s at least 9×4m with a depth of 30cm. A take‑off board of 20cm is placed 20m from the pit, and its surface is usually a slick rubber or synthetic material to aid a quick sprint‑into‑jump.
Pole vault gear is more specialized. The pole vault pole is a hollow fiberglass or carbon‑fiber shaft that flexes dramatically. Poles are labeled by length (in meters) and stiffness (a numeric rating). A 4.80m pole with a stiffness rating of 5.0 is typical for an intermediate male vaulter.
Supporting the pole is the vaulting box, a wooden or composite trough where the athlete plants the pole. The box’s opening must be at least 1.5m wide to accommodate different plant angles.
Finally, a pole‑vault landing mat is a thick, modular foam system that can be stacked up to 1.0m. It’s essential for safely absorbing the high, horizontal forces on a vault.
Throwing Events: Shot Put, Discus, Javelin, and Hammer
Each throwing discipline uses a uniquely shaped implement, all governed by strict weight and dimension standards.
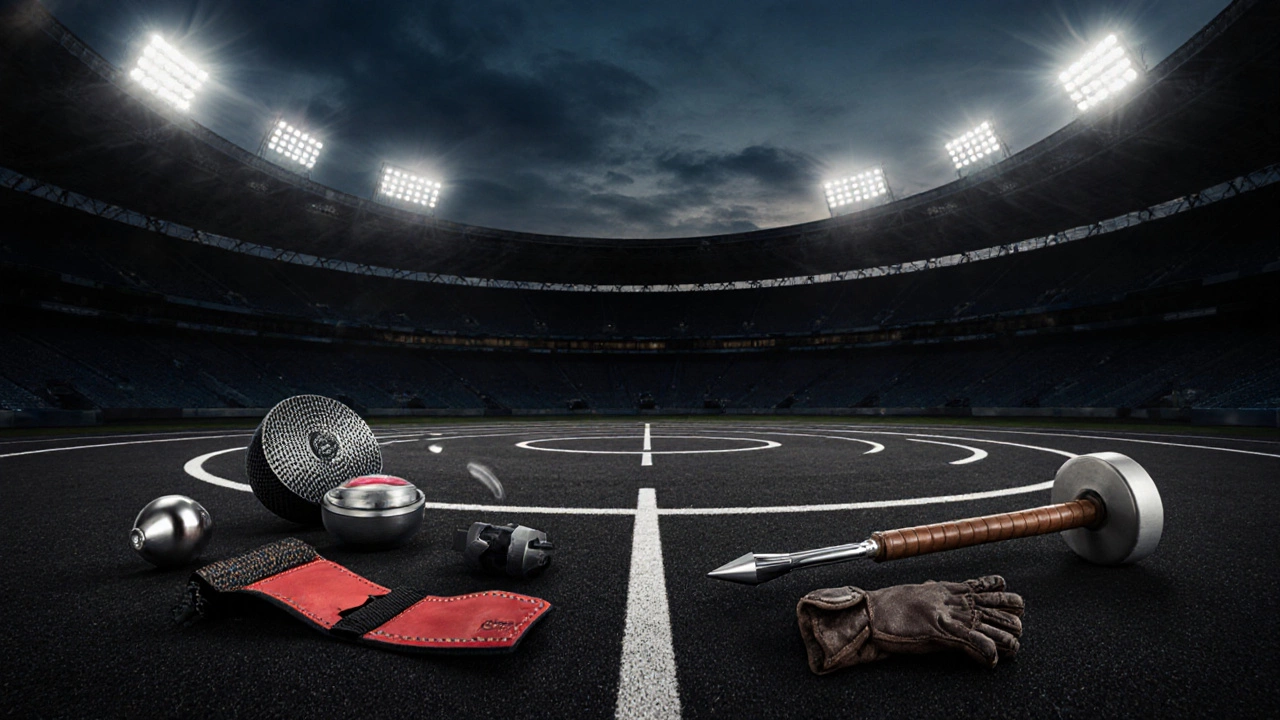
The shot put is a solid metal sphere weighing 7.26kg for men and 4kg for women. It’s typically made of steel with a smooth, polished finish. Training shots can be lighter (5kg or 2kg) to improve speed and technique.
Discus throwers use a discus that’s a rim‑weighted disc, 2kg for men and 1kg for women. The rim’s diameter is 22cm (men) or 18cm (women). Modern discs are made of carbon‑fiber composites that resist warping.
Javelins are slender, aerodynamic spears. The men’s javelin weighs 800g and measures 2.6‑2.7m, while the women’s version is 600g at 2.2‑2.3m. They feature a steel or titanium tip and a carbon‑fiber shaft for flexibility.
The hammer is a heavy ball (7.26kg for men, 4kg for women) attached to a steel wire with a grip handle. Competitive hammers are coated in leather or synthetic material to improve grip during the multiple‑turn spin.
All throws require a throwing circle of 2.135m diameter, marked with a solid line. The surface is usually a rubberized mat to provide stable footing while allowing a quick pivot.
Safety and Support Accessories
In addition to event‑specific gear, several accessories help prevent injuries and improve performance.
- Compression sleeves for calves and knees can reduce muscle vibration during sprint repeats.
- Weight‑lifting belts are useful for hammer and discus athletes who need core stability during the spin.
- Protective goggles are mandatory in javelin practice to guard against accidental tip strikes.
- Gloves with textured palms improve grip on hammer handles and discus rims.
Choosing and Maintaining Your Gear
Buying the right equipment isn’t just about brand name; it’s about fit, surface compatibility, and durability.
- Fit first. Try on spikes with your competition socks; there should be a snug heel lock but no pinching at the toes.
- Match the surface. Use 4‑pin spikes on indoor tracks, 6‑pin on standard outdoor tracks, and 8‑pin on soft synthetic surfaces.
- Check regulations. Governing bodies like World Athletics set strict size/weight limits for throws. Verify that your implements meet the standards for the level you compete at.
- Maintain regularly. Rinse spikes after rain, wipe down metal implements with a dry cloth, and inspect landing mats for tears before each meet.
- Plan for replacement. Spike pins blunt after 20‑30 races; a new pair restores traction. Throwing implements can develop cracks; replace them when you notice any deformation.
Comparison Table: Spike Types vs. Track Surfaces
| Pin Count | Typical Surface | Advantages | Potential Drawbacks |
|---|---|---|---|
| 4‑pin | Indoor synthetic / hard plastic | Quick foot turnover, low drag | Less grip on wet outdoor tracks |
| 6‑pin | Standard outdoor synthetic (Mondo, Rekortan) | Balanced traction and speed | May wear faster on abrasive surfaces |
| 8‑pin | Soft or low‑grade outdoor tracks | Maximum surface bite, ideal for steep inclines | Heavier feel, can increase foot fatigue |
Frequently Asked Questions
What basic gear do I need for a first‑time track meet?
At minimum, you’ll need a pair of event‑appropriate spikes (or flats for distance), a set of starting blocks if you’re sprinting, a water‑bottle, and a basic first‑aid kit. For jumps, bring a lightweight jump mat if your venue doesn’t supply one.
Can I use the same spikes for both 100m and 400m races?
Generally yes, as long as the spikes match the track surface. Some athletes prefer a slightly softer plate for the longer 400m to reduce foot strain, but many stick to a single pair of 6‑pin spikes for both events.
How often should I replace my throwing implements?
Inspect them after every season. Shot puts and discus discs can last several years if stored dry. Javelins and hammers, because of their moving parts, often need replacement after 2‑3 years of high‑level use.
Do I need a special bag for my pole vault pole?
A padded pole bag protects the carbon‑fiber shaft from dents and scratches. Most clubs provide one, but buying a personal bag ensures the pole stays in good condition during travel.
What safety measures are essential for beginners?
Start each session with a proper warm‑up, use only competition‑approved equipment, and always have a certified coach or official present when practicing jumps or throws. Checking the integrity of landing mats before each use can prevent serious injuries.